| REVIEWED RECIPES |
| More popular recipes... |
| FEATURED |
| SPECIAL RECIPES |
| More featured recipes... |
| Slow Cooker · Soups, Stews and Chowders · Best Casseroles · CM's Casseroles · CM's Soups & Stews |
| HOME CANNING CHILI | |
|
Here's a recipe along with the detailed instructions for canning Chili, No Beans, adapted from the newest Ball Blue Book, which is a nice reference to have on hand if you plan to do any canning. You'll need a pressure canner (12 quart capacity or more), canning jars and new lids and rings, a jar lifter (for removing hot jars after processing) and a canning funnel. 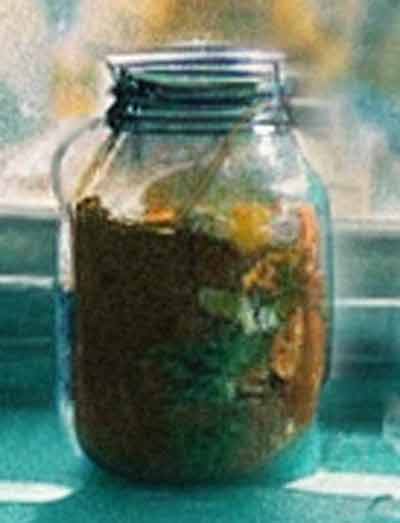 5 lb. ground beef 2 cups chopped onions 1 clove minced garlic 6 cups canned tomatoes and juice 1/2 cup chili powder 1 1/2 tablespoons salt 1 hot red pepper, finely chopped 1 teaspoon ground cumin seed I modify the recipe somewhat by adding a few extra cloves of garlic and another hot pepper (depending upon how hot the peppers are). I also sometimes add 1/4 cup cider vinegar and several tablespoons of ketchup and use 2 teaspoons cumin instead. That spices things up a bit! Extra Instructions for using fresh tomatoes (skip if using canned): In the Summer, use fresh tomatoes instead of canned. Wash and peel the tomatoes by dipping briefly in a boiling water bath until the skins begin to break. Dunk quickly into cold water and set aside til cool. Use only ripe, blemish-free tomatoes. Cut off the top and bottom ends of the tomato, then remove seeds from the "pockets" using a baby spoon. Chop and simmer. I have an Italian tomato squeezer which looks a little like a hand crank meat grinder. You put the tomatoes in the top (unpeeled), turn the crank and peeled, seeded puree comes out. This makes things easier when doing large batches. (I once planted and canned from 200 tomato plants!) In the bottom of a large stockpot, brown the ground beef, onions and garlic. Drain well any excess fat. This is an important step as high fat content foods don't keep as well canned; additionally the fat has a tendency to cause a higher proportion of jar seals to fail during processing. Add the remaining ingredients and reduce heat to a simmer. Continue to cook about 20 minutes. Skim off any excess fat.
Place the jar caps in hot water to sit until ready to use. Fill hot jars, one at a time, with hot chili, leaving 1-inch of headspace. Headspace is the amount of space between the lid and the chili. Remove air bubbles from the mixture, if any exist, using a plastic knife or a straw (or a plastic bubbler available from Ball). Wipe the rims of the jars with a damp paper towel so that they're perfectly clean which allows them to seal effectively. Put the lid on and tighten the ring just until the point of resistance is met. Place the jar into the simmering water in the canner, and continue to fill the remaining jars until all are used. Place the lid on the canner but leave the petcock open or if you're using a weighted gauge canner, don't place the weight on for 10 minutes. It's necessary to vent a pressure canner so that there are no air pockets in the canner during processing. After 10 minutes of venting close the petcock or position the weighted gauge. Don't begin timing until the gauge begins to rock 2-3 times a minute, or if using a dial gauge canner, when the pressure comes up to 10 pounds. Begin timing. Process pint jars for 1 hour 15 minutes, or quart jars for 1 hour 30 minutes. If you're at a higher elevation than 2000 ft, check with your USDA extension service about adjusting processing times for your elevation. After the processing time has completed, allow the pressure canner to cool for 30 minutes and remove the weight gauge. After pressure is at 0 lbs psi (on dial gauge, or not steam escapes after weight is removed), then you can safely remove the lid. Face the lid away from you as it is removed, being careful of the steam. Allow jars to sit 5 minutes in the canner, then remove using the jar lifter to a draft-free place to cool. Allow to sit 24 hours, then carefully remove rings and wash jars. Test lids by tapping gently with a metal spoon - you will hear a ringing sound. If you hear a dull thud from a jar that doesn't sound like the rest, break the seal and put this jar in the refrigerator and use within a few days or reprocess within 24 hours using a new lid. Yields 6 pints or 3 quarts. You may double or triple this recipe if you have a larger canner. A 21 quart capacity pressure cooker allows you to process 18-19 pints at a time. Serve chili with cooked or canned kidney, pinto beans, elbow macaroni or wide egg noodles if desired. Submitted by: CM | |
 Meanwhile, prepare a pressure canner with several inches of simmering water. Place clean jars in the simmering water (may be washed in a dishwasher - if your dishwasher has a sani-cycle, all the better).
| 11 reviews | Add review Share |
SUPPORT THIS RECIPE BY SHARING | |||
| Print recipe: | Printer-friendly version | ||
| Link to recipe: | Copy | ||
| Email recipe to: | |||
from my kitchen to yours,
Jessica Marie
| ADD YOUR REVIEW |
| RECIPE PULSE |
| TRENDING NOW |